Converting a PowerShell Project to use Azure DevOps Pipelines
 Daniel Scott-Raynsford
- 16 Min To Read
- 20 Sep, 2018
- Comments
Introduction
Continuous Integration (CI) is the process of integrating code into a source code repository several times a day. Each time code is pushed into the repository an automated process runs to build and verify the code continues to work. This is often called the “CI process” and needs to run on an agent, usually a Windows or Linux machine dedicated to the task. Developers and practitioners of “DevOps” have been using this practice for several years, but it is now becoming common and even critical path with IT professionals.
If you’re putting your code in a source code repository within a corporate or private environment, you may have some private CI tools set up to run your “CI process”, for example Team Foundation Server or Jenkins.
But what about if you’re running an open source public project in GitHub? You had to use one of the free (for open source public projects) CI systems available such as AppVeyor, which provides Linux and Windows agents or TravisCI which provides Linux and macOS agents. For PowerShell projects you pretty much had only one option: AppVeyor. But with the ability for PowerShell to run across multiple platforms (Windows, Linux and macOS) with PowerShell Core the need for a multi-platform CI has become more important. This meant you needed to add multiple CI systems to your open source project to ensure your PowerShell Core module or code works correctly on Windows, Linux and macOS.
With the introduction of Azure DevOps Pipelines you can now use the same CI process across Windows, Linux and macOS using the same system. For open source projects this is free, and you can have 10 concurrent CI processes running at the same time. You can keep your existing TravisCI and AppVeyor processes if you’ve got them configured already – there is no restriction to how many different CI processes you can have running on a GitHub open source project.
In this article I’ll share my experiences moving one of my open source multi-platform PowerShell Core module projects over to use Azure DevOps Pipelines. This project already had a well-defined CI process set up using PowerShell scripts and Pester, PSScriptAnalyzer, PSake, PSDepend, BuildHelpers, and PSDeploy modules. So, this article won’t be showing how to write PowerShell to create a CI process, as that is a book in itself.
Disclaimer: Azure DevOps is a rebranding (and more) of an existing cloud-based development tool called Visual Studio Team Services. I’ve been using Visual Studio Team Services build and release pipelines for a couple of years in a private corporate environment, so many of the techniques I implemented such as YAML build definitions weren’t new. However, the experience of getting my GitHub account set up to use Azure DevOps Pipelines was new to me.
Getting Started
To get started using Azure DevOps Pipelines with your open source project you’ve got to hook up your GitHub account to an Azure DevOps organization. The easiest way to do this is to find the Azure Pipelines service page in the GitHub marketplace:
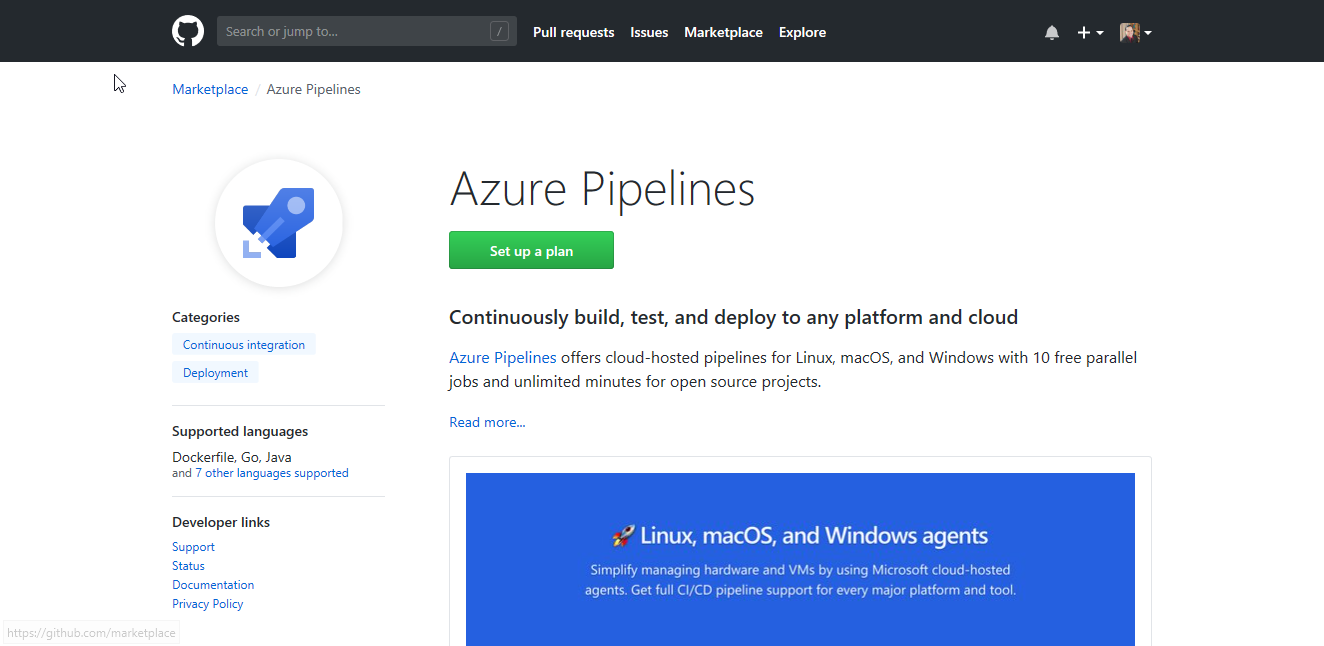
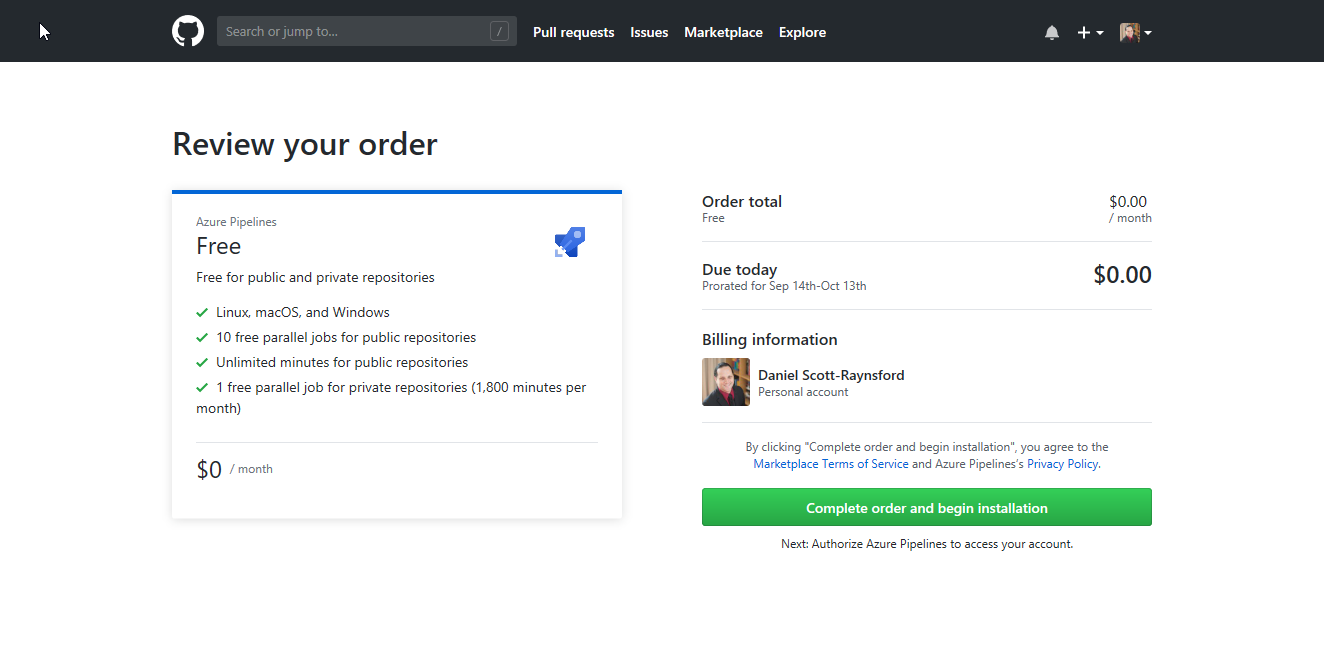
Once you’re there, just click Set up a plan and then click Install it for Free. You’ll then be able to review the details of your order.
Note: If your GitHub account is an owner of a public or private organizational account in then you may also choose the billing account under the Billing information.
Once you’re ready, click Complete order and begin installation:
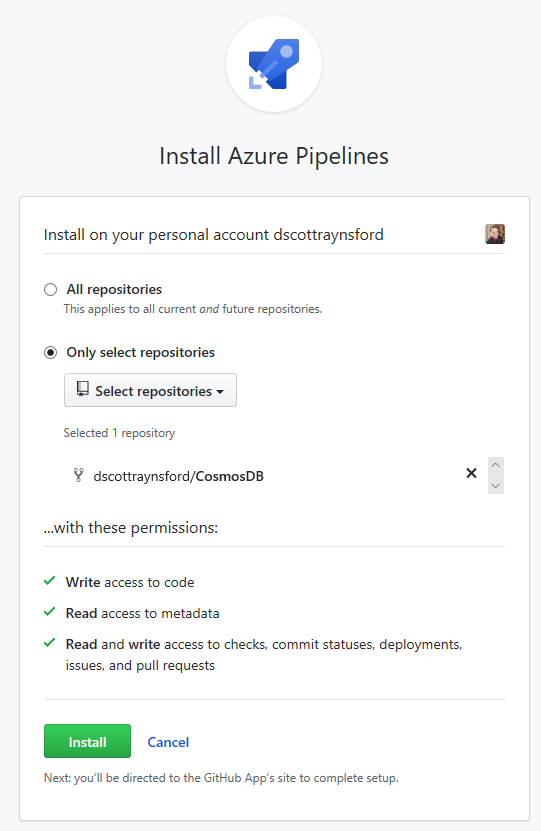
GitHub then asks which repositories to Install Azure Pipelines into. This will grant Azure Pipelines permissions to perform certain tasks on any repositories you select. I chose to enable Azure Pipelines on just a single repository to start with, but you could select All repositories.
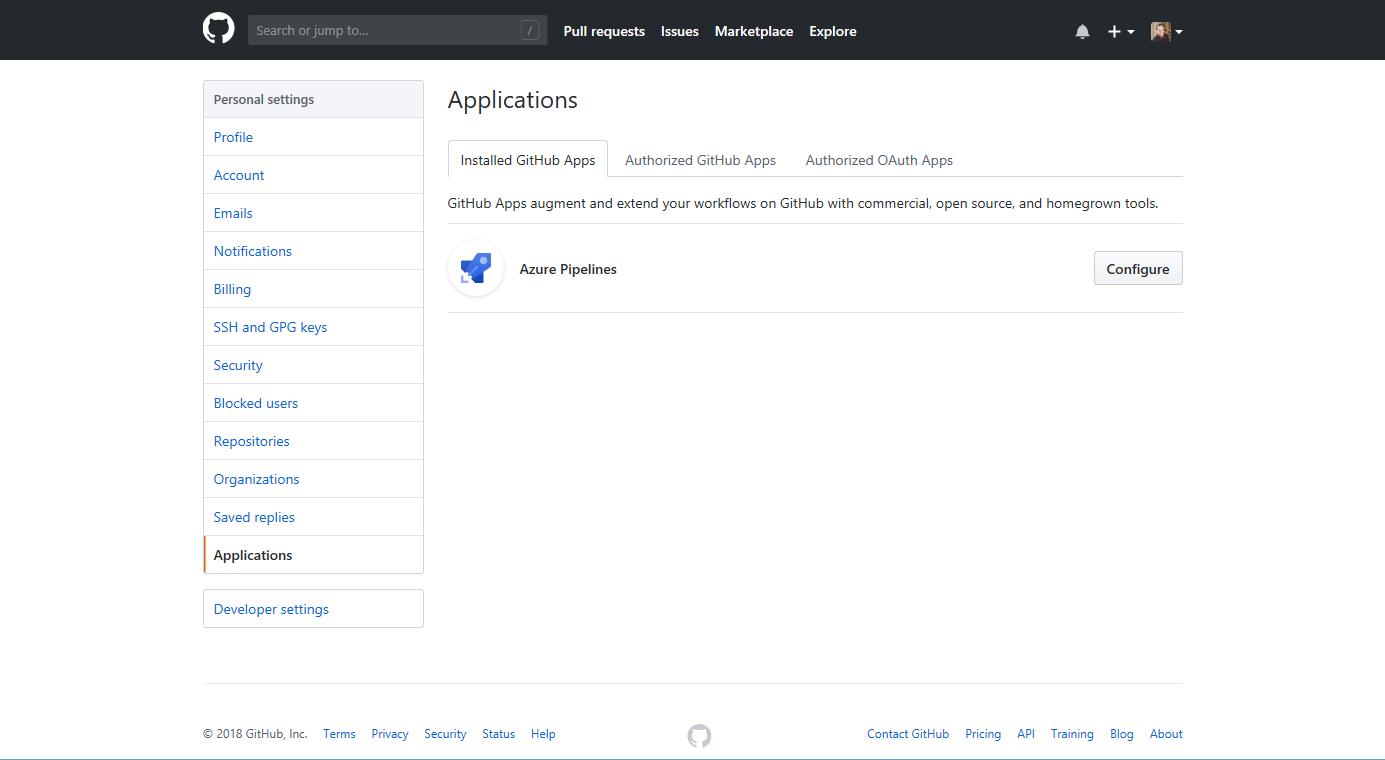
It is easy to enable Azure Pipelines into additional GitHub repositories later by heading over to Applications in your GitHub Settings and clicking Configure next to the Azure Pipelines installed GitHub Apps:
Clicking Install takes you over to Azure DevOps where you will be required to login with a Microsoft Account. If you’ve already got an Azure DevOps organization (or a previous VSTS organization) you’ll be asked to select the organization to add the Azure DevOps Pipeline to. But if your Microsoft Account isn’t a member of an Azure DevOps organization then one will be created automatically for you. You can change the name of the Azure DevOps organization later if the default name doesn’t suit you.
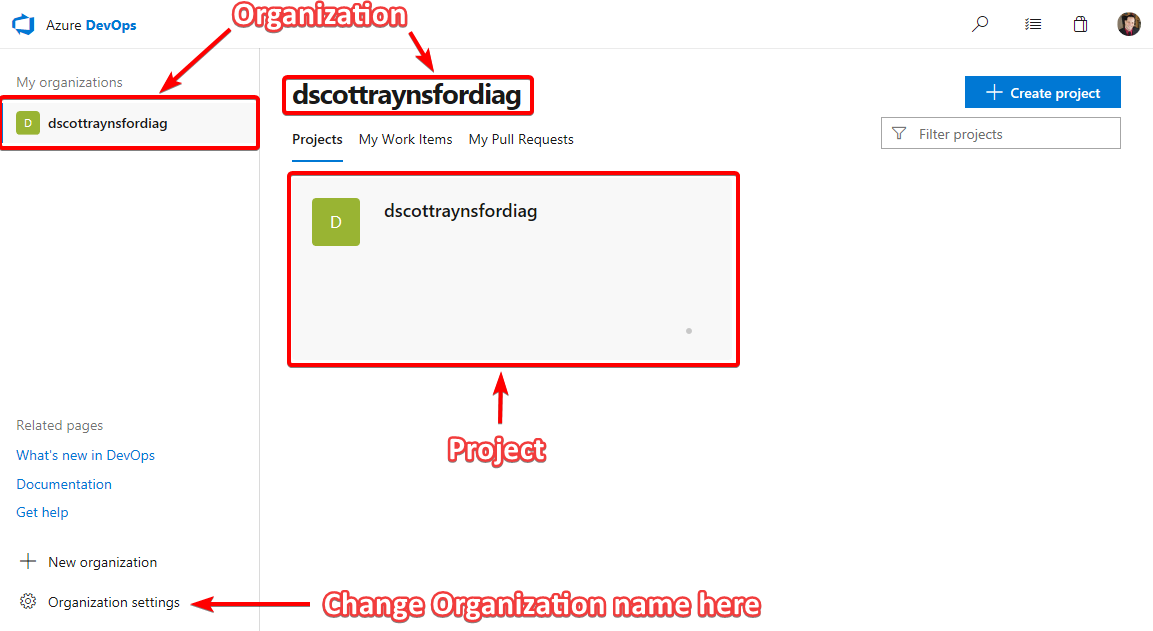
If a new Azure DevOps organization was created for you then a new project will be created in the Azure DevOps organization with the same name. This isn’t too obvious at first.
But if you chose (or had an option to choose) to use an existing Azure DevOps organization (e.g. if you had a previous VSTS organization attached to your Microsoft account) then you’ll be asked to select an existing project or create a new one. The flow is slightly different, but still very straightforward.
Whether or not you had a project and organization created for you or used existing ones you’ll be taken straight to the New Pipeline screen:
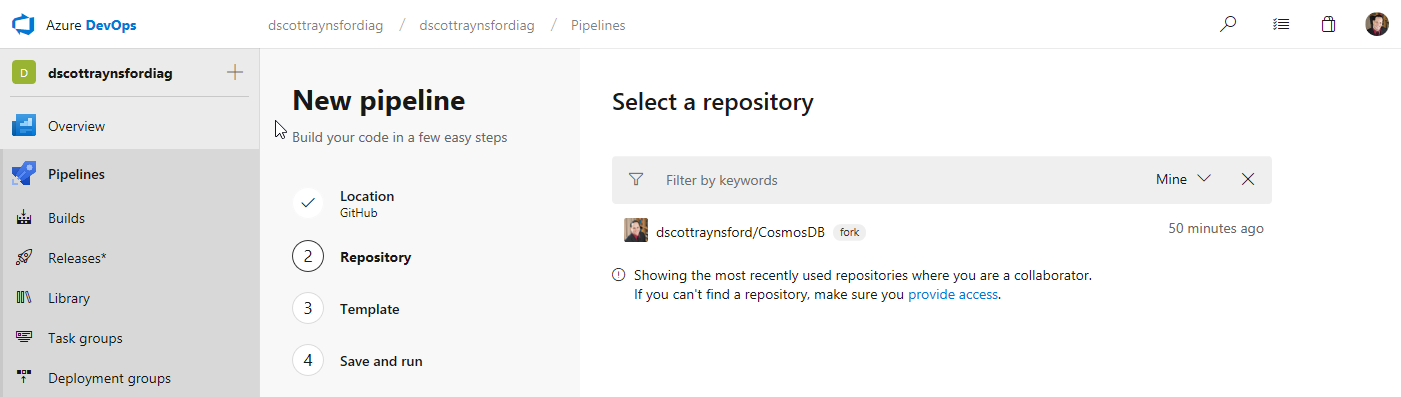
This is a new experience that was not present in the old VSTS. The list of repositories that have been granted access to Azure DevOps Pipelines will be listed. Clicking the repository to create a pipeline for will display the Template step.
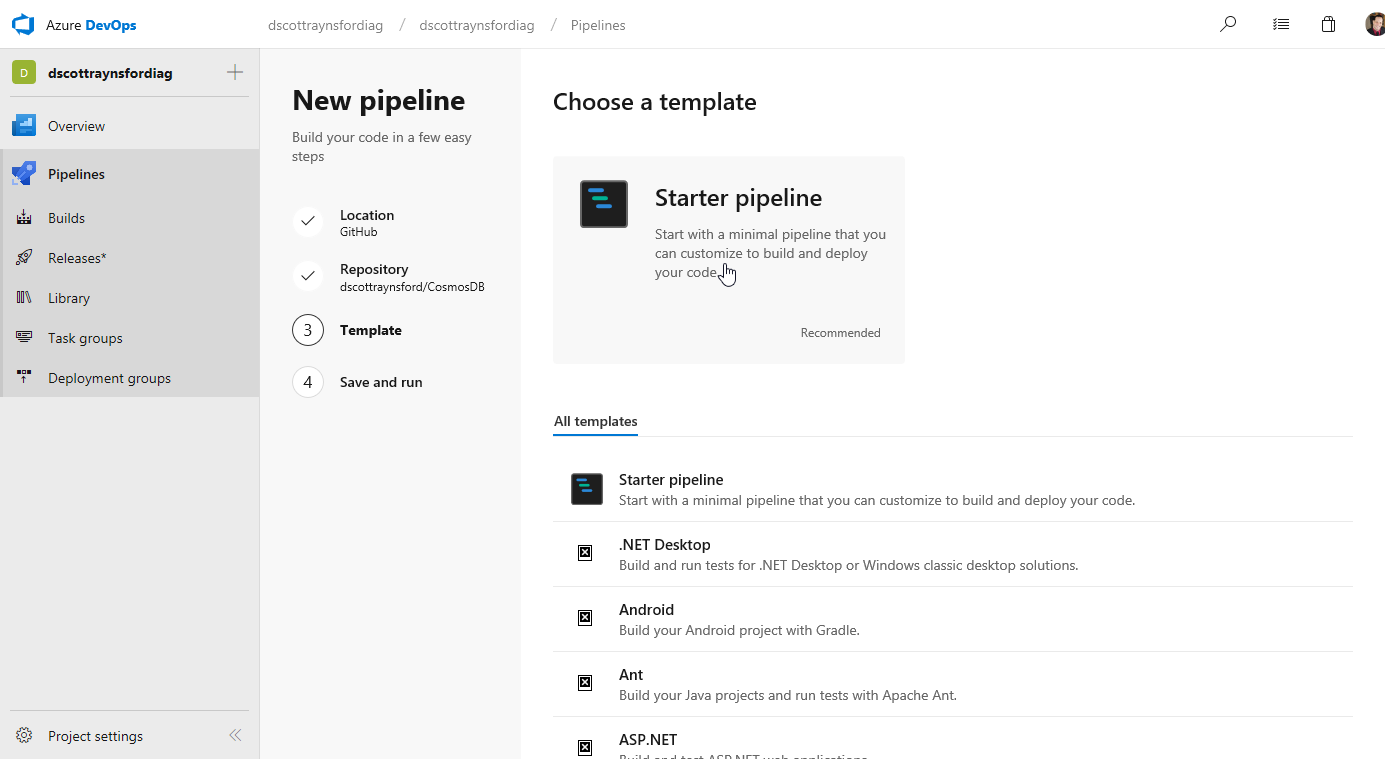
The Template step is where you can select from a list of CI build templates for common project types. Unfortunately, a template for PowerShell modules or projects is not provided, but this is fine because we don’t need anything fancy if using the PowerShell PSake module to include all the build code in a psakefile.ps1 in the GitHub repository (which I had done).
I just selected Starter pipeline:
A YAML file is displayed that describes the steps that will be performed each time the CI process runs. This file, named azure-pipelines.yml, will be committed into the root folder of the GitHub repository for us.
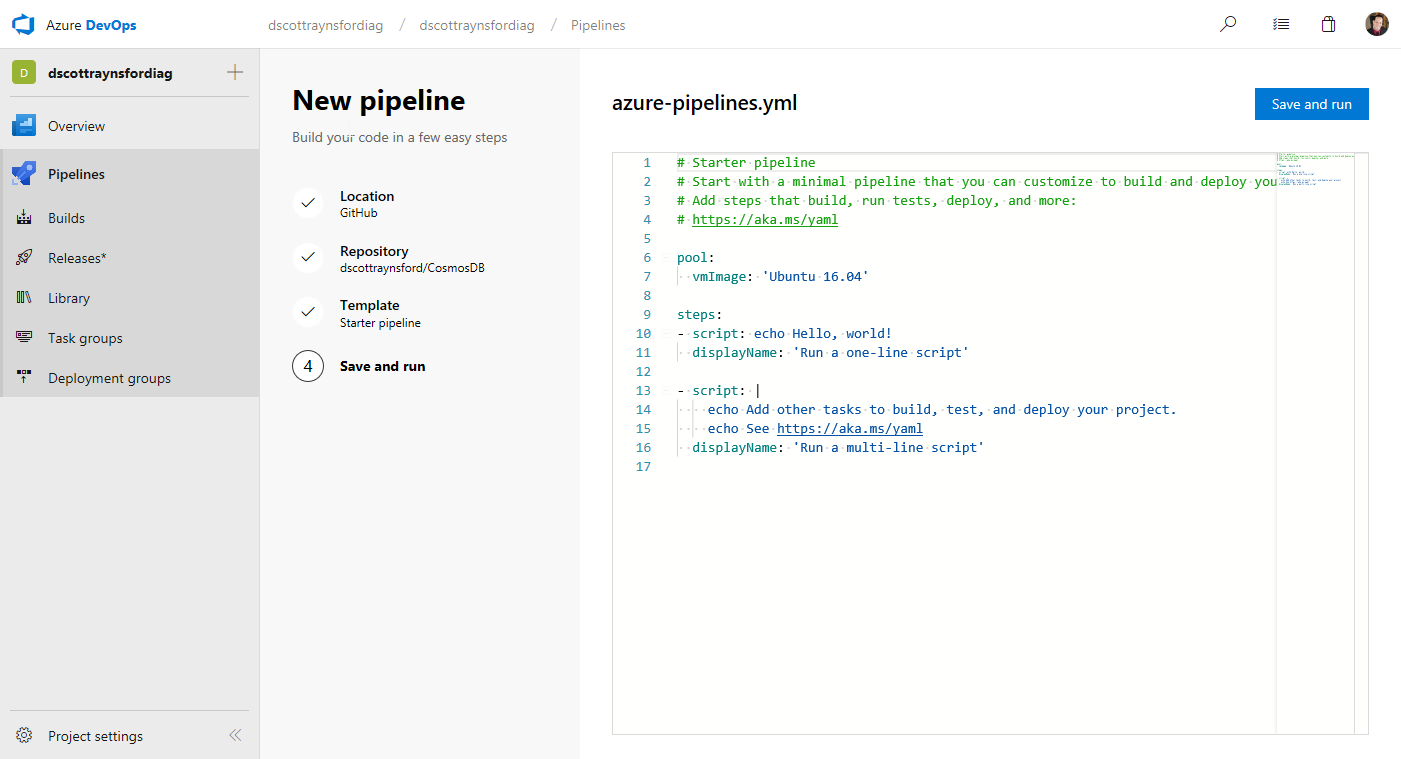
What we would typically do is customize the YAML file to define jobs, steps, tasks and other configuration items that are used to drive our CI process. We can customize this file directly in this editor or do it later by changing it in the repository.
For the CI Process to build and test my Cosmos DB PowerShell module I used the following:
| |
I’ll cover the content of this file further down. But for now, click Save and Run.
This gives you the option of committing directly to dev branch (or whatever the default branch of your repository is set to) or creating a new branch for this commit and start a pull request:
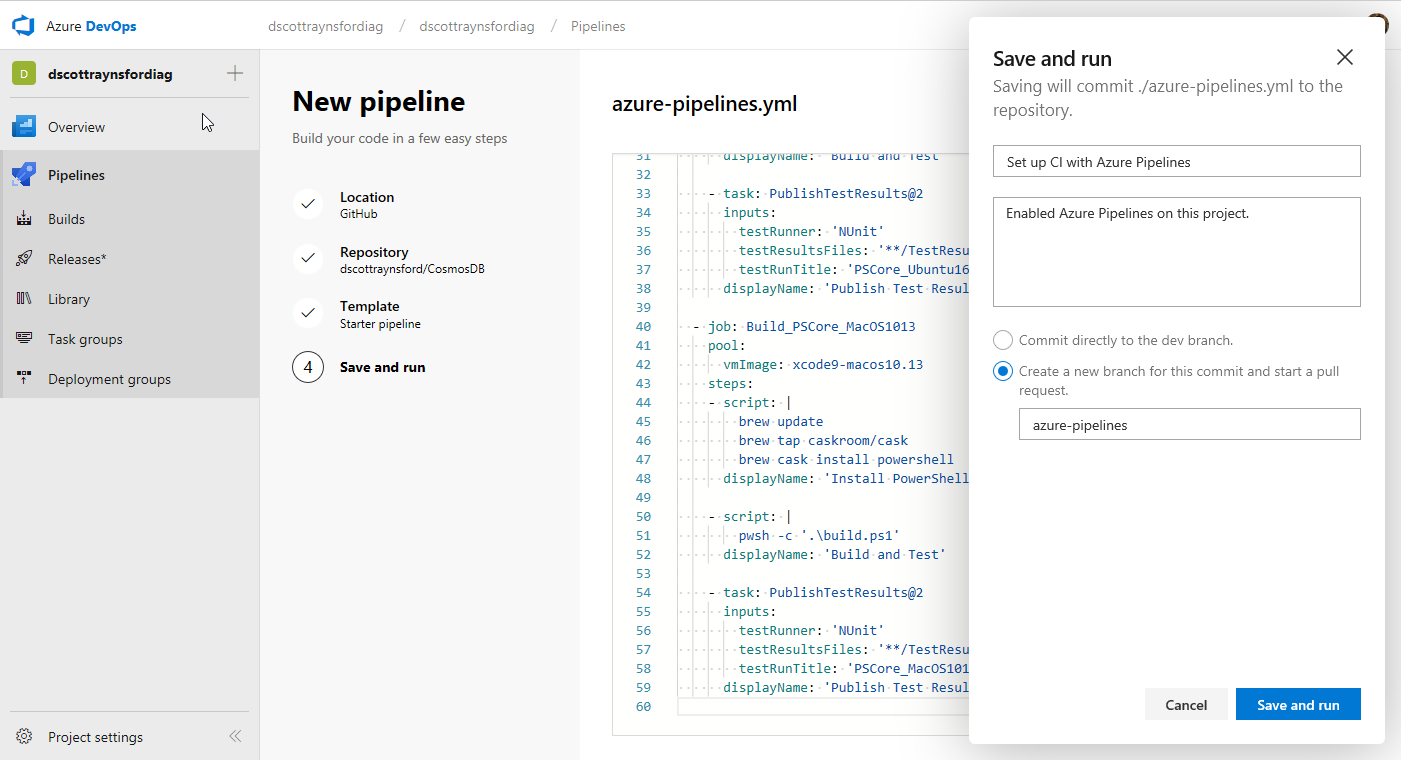
What you choose to do will depend on if the GitHub repository allows contributors or owners to commit directly to the default branch or if changes must be made by way of a Pull Request. I used a Pull Request as this allowed me to get the CI process working before making changes to my default branch.
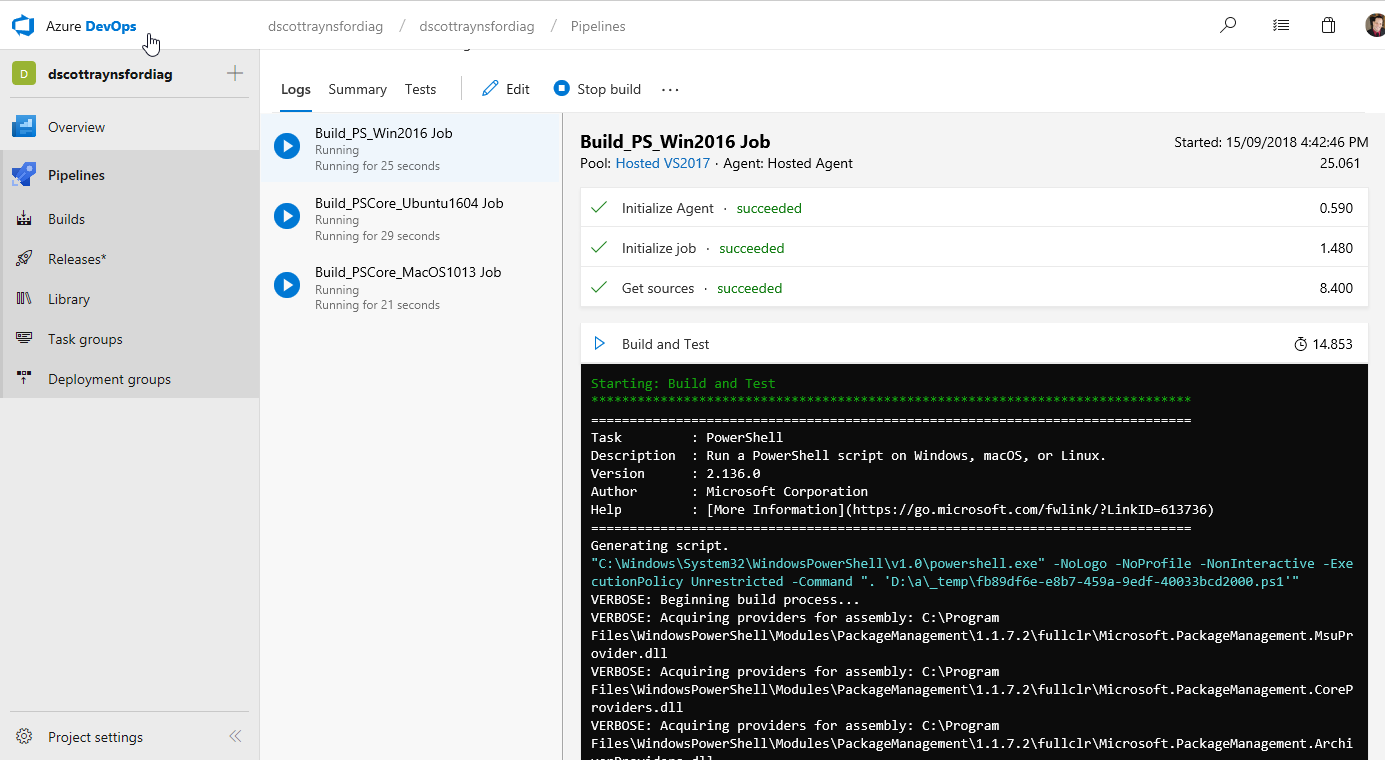
Clicking Save and run again will commit the file and create the new Azure Pipeline. It will also manually trigger a build using the Azure Pipeline and the YAML file that was created.
Note: Although this happens automatically, this is still considered a manual trigger, because this wasn’t triggered by a commit to the GitHub repository.
If your CI process was successful with no errors (no PowerShell errors or test failures) then you can merge your Pull Request in GitHub:
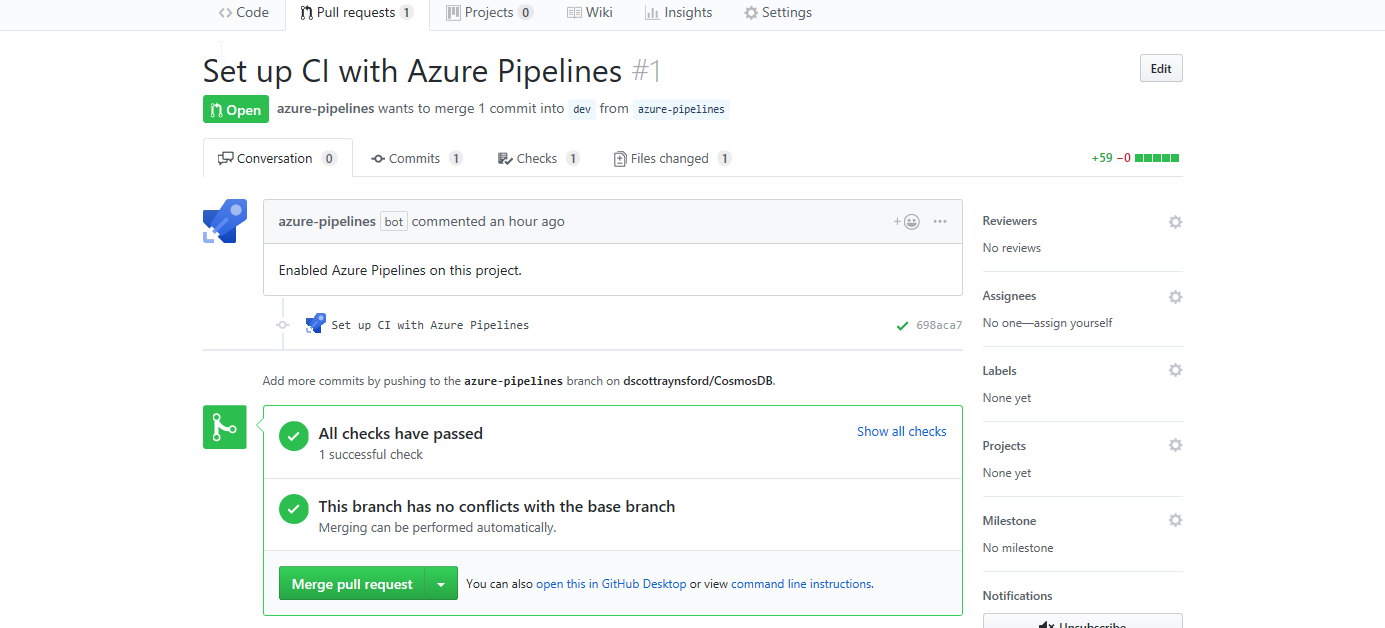
The setup of the CI process in Azure Pipelines is now completed. It was pretty easy, and I managed to get the basics working in around 30 minutes.
Triggers
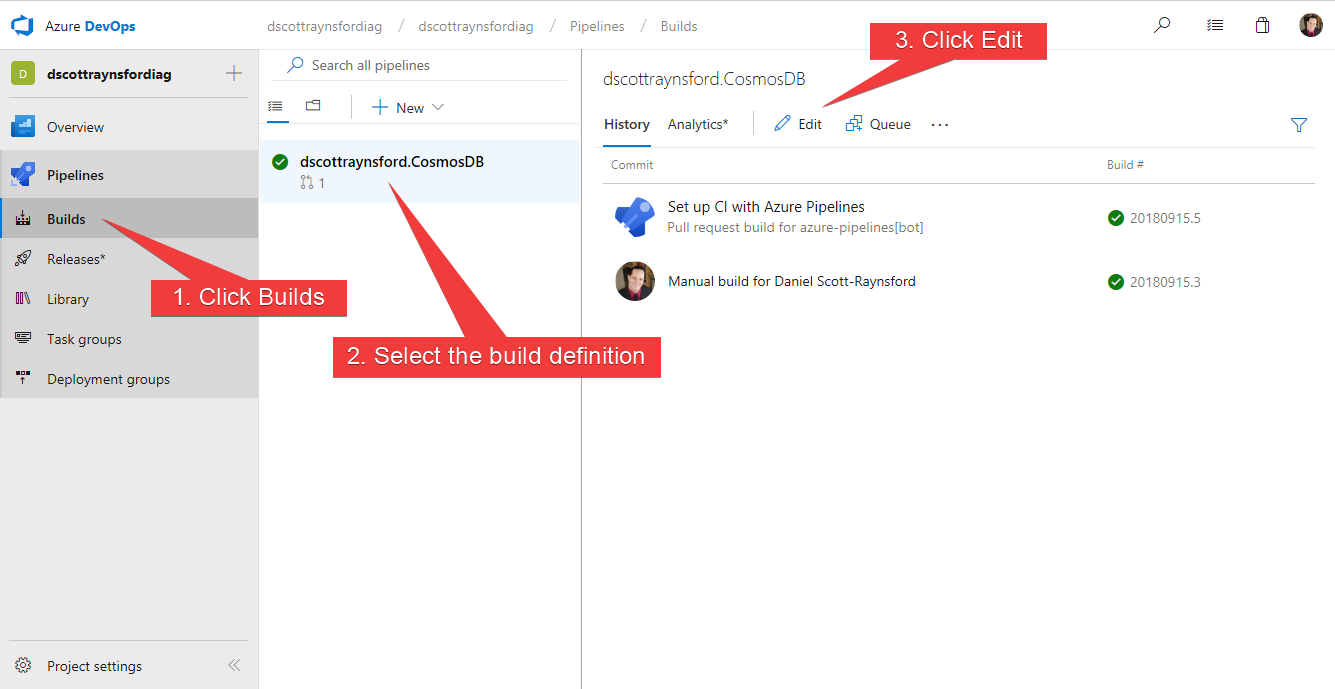
By default, when you create an Azure DevOps Pipeline it is configured to be triggered when any commits are made to the default branch (usually dev) and for any Pull Requests made to the default branch. In my case I prefer my CI process to be triggered on changes to any branch. So, I needed to edit the Triggers section in the Build definition by editing it in the Azure DevOps interface:
Once in the Build definition on the Triggers tab I changed the Continuous Integration trigger to contain a Branch Filter to include *****:
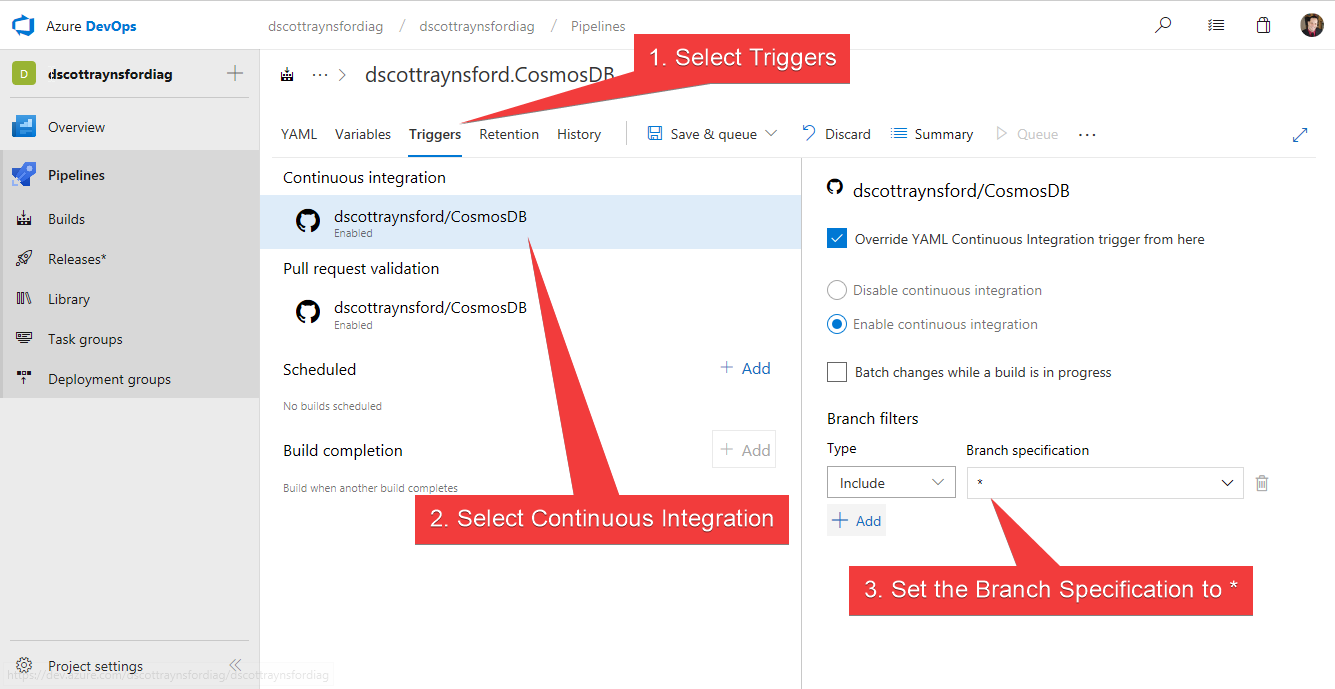
The Save & Queue (or just Save) the updated Build definition.
Note: This can also be done by adding a Triggers entry to the YAML definition in the source code repository (see this page for more information).
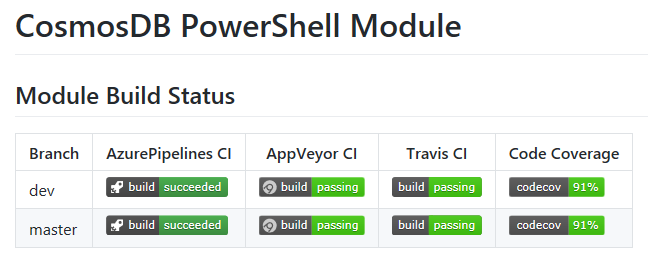
Build Badges
A useful feature of most CI tools is that they allow you to easily display the status of your CI process pipelines in a README.MD or other documentation in your repository:
Azure DevOps Pipelines is no exception. To get the example markdown to display the badge:
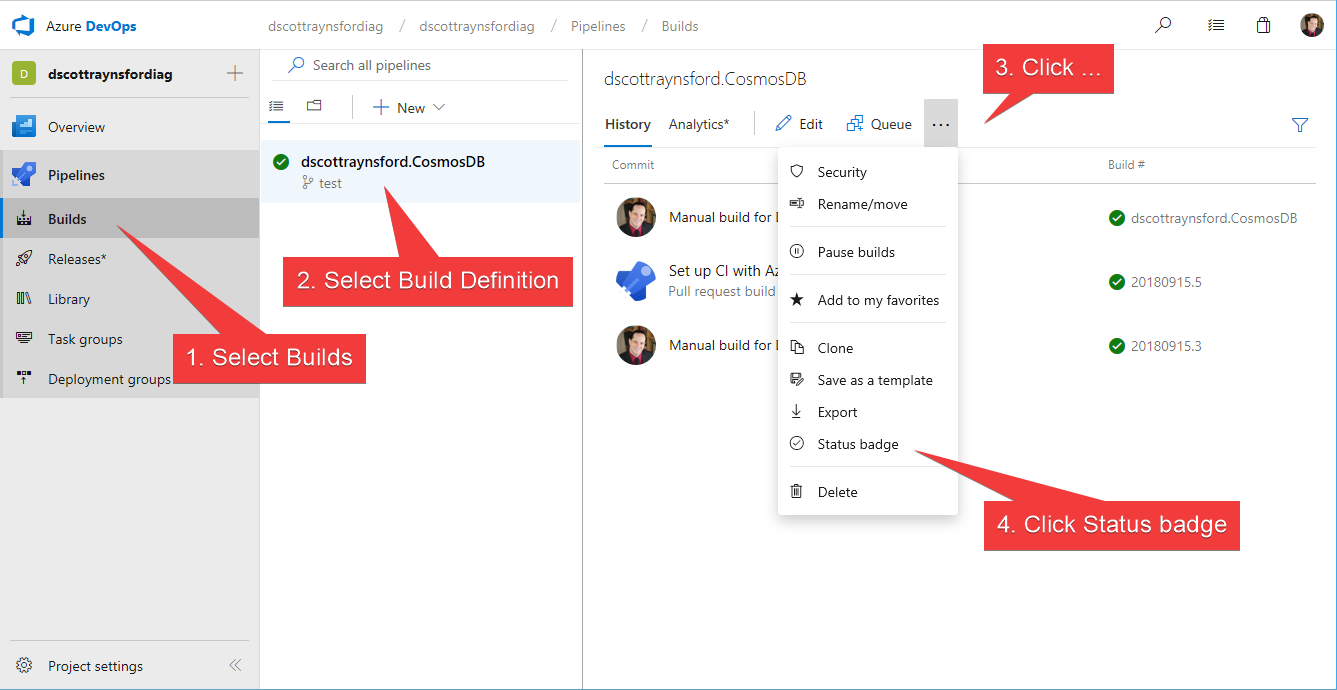
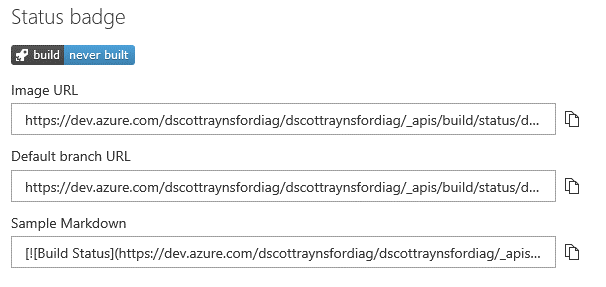
I copied the Sample Markdown and pasted it into the README.MD in my project. This also makes it simple for anyone to click the badge and jump over to the project.
Making it Public
If you had allowed the GitHub marketplace item for Azure DevOps Pipeline create your Azure DevOps organization and project, then it will have created the organization as allowing Public projects and made this project Public:
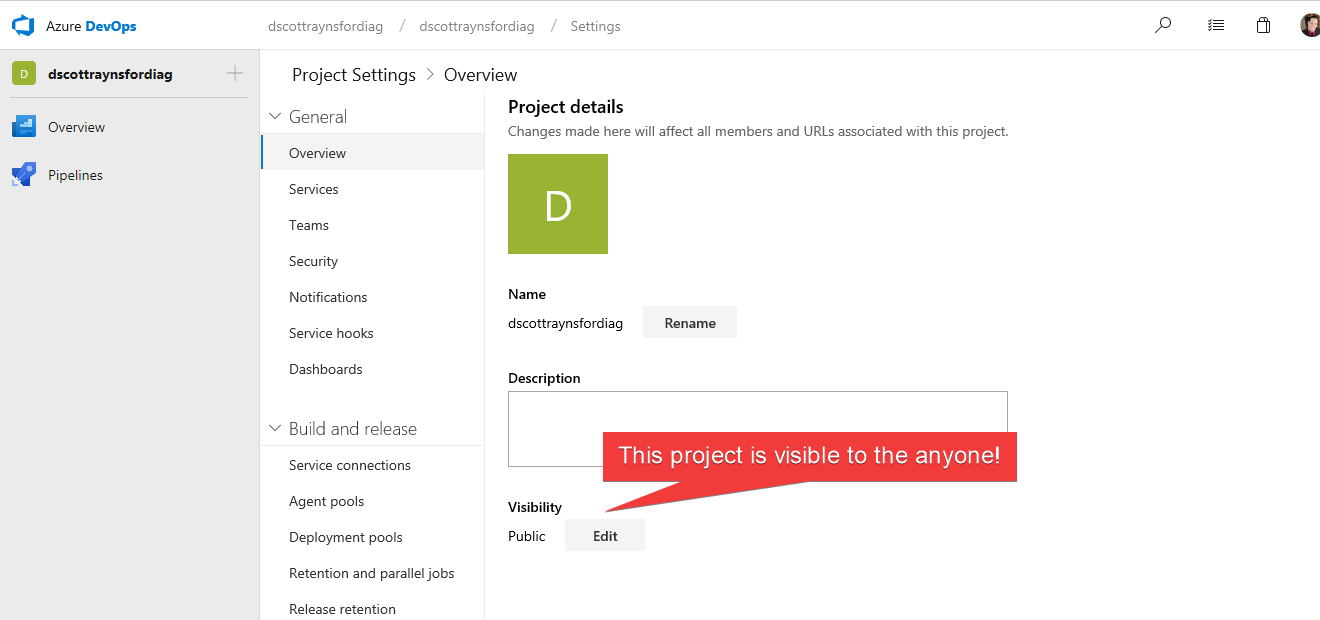
This does not mean anyone can edit the project or create/edit builds, but it does mean that anything that happens gets logged in the CI process during the build will be visible to everyone.
Note: Azure DevOps Pipelines will try to protect sensitive build variables by masking them, but we’ll cover that shortly.
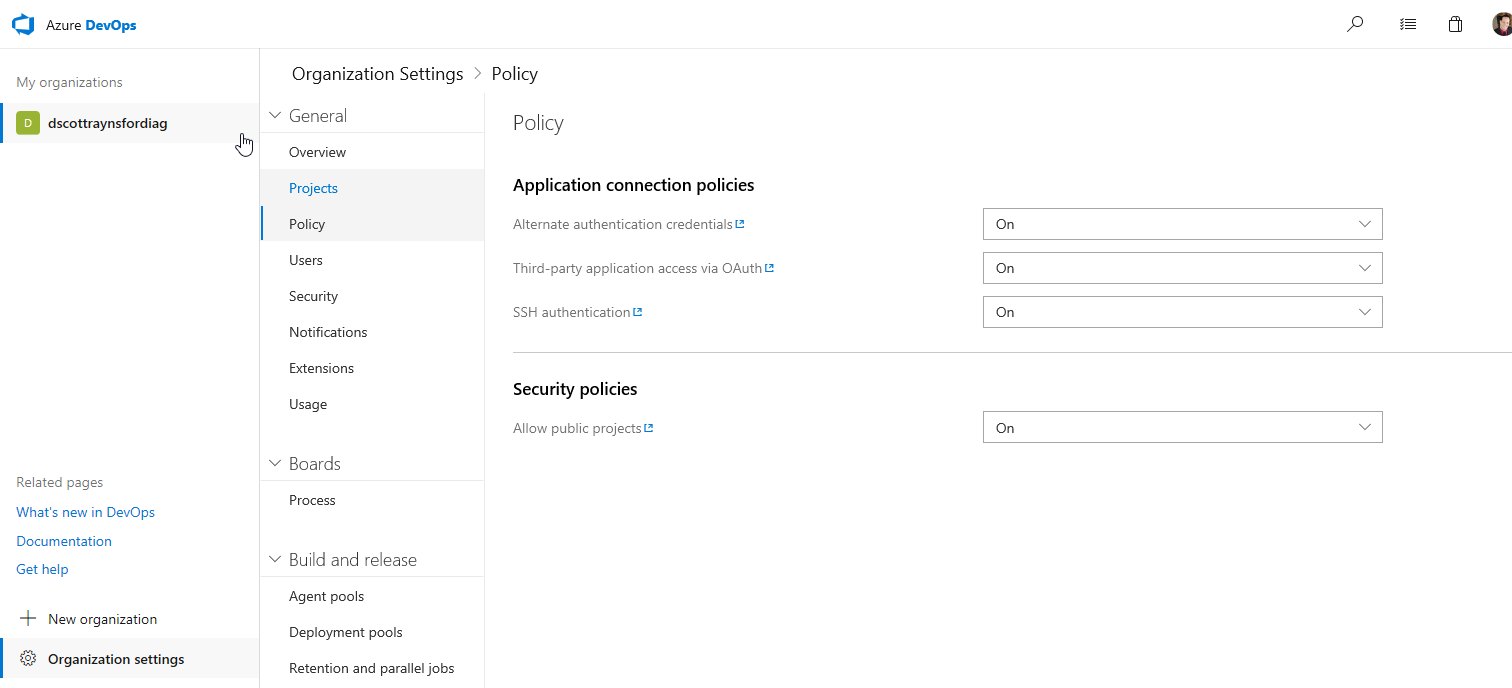
However, when I set up my first project I was using an existing organization, which was configured to prevent Public projects. This meant that my project was configured as Private visibility only. This wasn’t ideal because all contributors and end consumers of an open source project need to be able to view the CI process logs and test results. I had to go into my Organization settings and set the Allow public projects Security Policy to On:
My azure-pipelines.yml File
The most challenging part of setting up an Azure DevOps Pipeline is configuring the azure-pipelines.yml file, but it becomes quite clear how this works without too much research. All other continuous integration tools I’ve used require or at least support a YAML or some other declarative syntax file to be provided within the repository to control the CI process, so this isn’t unusual. This is often referred to Pipeline as Code.
Note: With Azure DevOps Pipelines, you can also use a visual designer to define a build pipeline and then export the YAML file or just keep the visually designed pipeline and use that. I’d recommend exporting the YAML file and putting it in your repository because then the CI process definition itself is under source control.
Jobs
In my case I created a file that defined a simple CI process that contained three jobs:
- Build and test the module on an agent running Windows Server 2016 using PowerShell.
| |
- Build and test the module on an agent running Ubuntu 16.04 using PowerShell Core.
| |
- Build and test the module on an agent running MacOS 10.13 using PowerShell Core.
| |
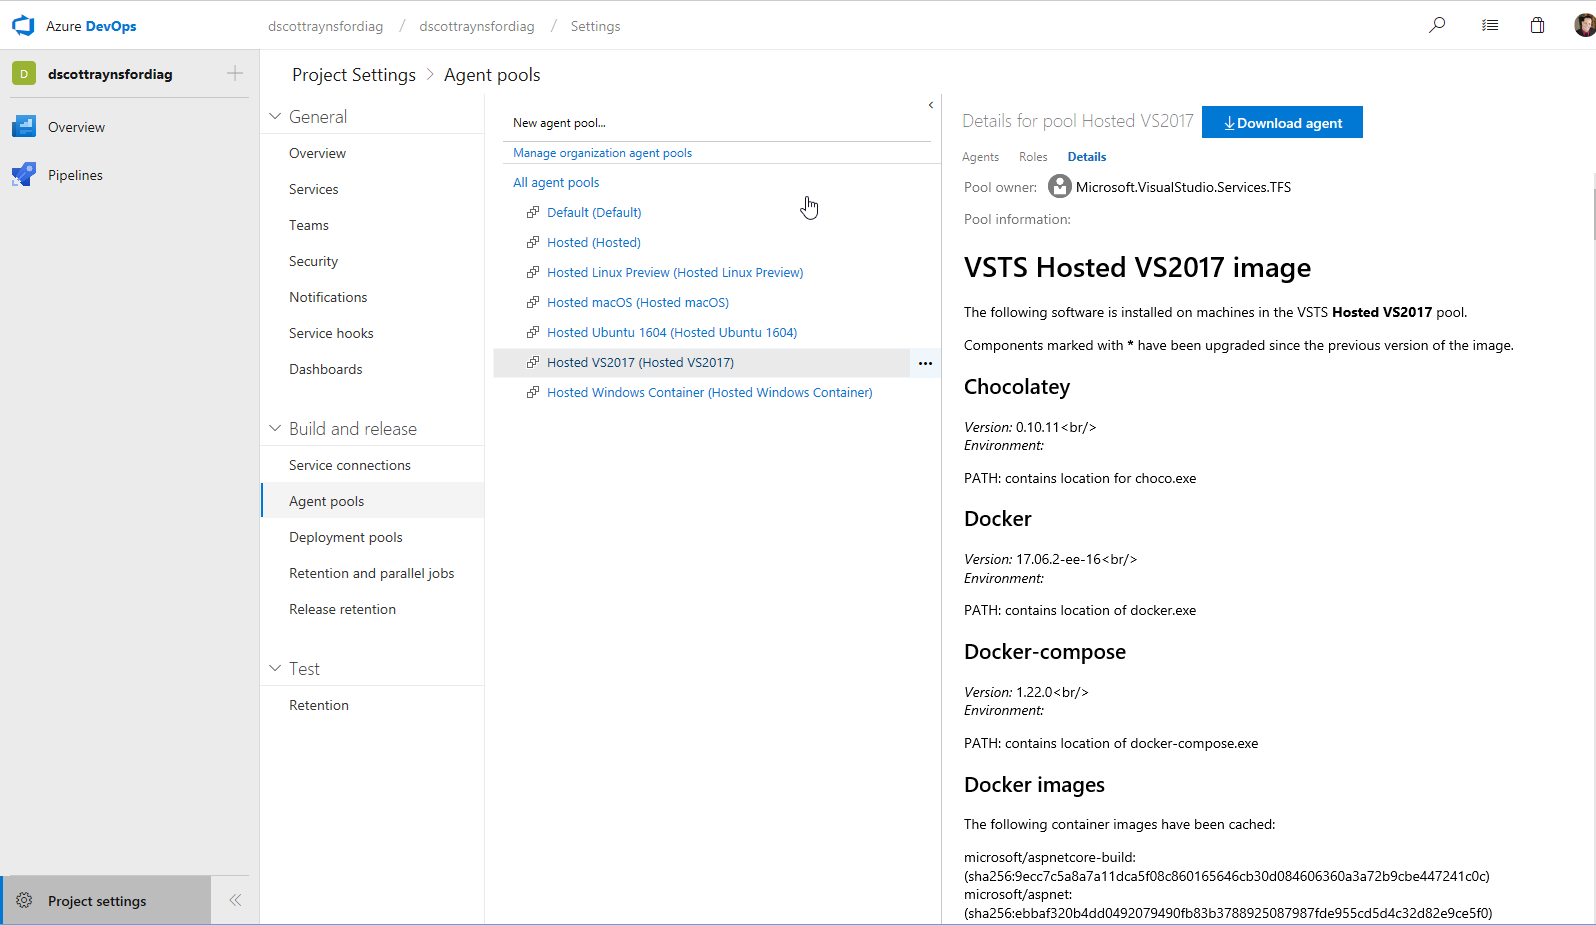
The jobs run in series each time the build triggers and runs on an agent in an Agent Pool using the vmImage specified. The available Agent Pools and the exact software installed onto them can be found in the Project Settings:
Steps & Tasks
Each job contained a single step with two or three tasks:
For the Build_PS_Win2016 job, I just had two tasks:
- Run the PowerShell script ps1 in the repository (with -Verbose output enabled). The build.ps1 just runs the tests (using Pester), build the PowerShell help (using PlatyPS) and prepares the module for publishing. It does this by using PSake to run tasks defined in the psakefile.ps1:
| |
- Publish the result of the Pester tests to back to the build so that they are available in the report:
| |
For the Build_PSCore_Ubuntu1604 job, I needed to perform similar tasks as the Windows one, but I also needed to add an additional task:
- Install PowerShell Core:
| |
- Run the PowerShell script ps1 in the repository (with -Verbose output enabled). The build.ps1 just runs the tests (using Pester), build the PowerShell help (using Platyps) and prepares the module for publishing. It does this by using PSake to run tasks defined in the psakefile.ps1:
| |
Note: This is slightly different to the Windows task as I can’t use the PowerShell task type, I instead use the script task type, executing pwsh (PowerShell Core) and passing in the name of the script to run
- Publish the result of the Pester tests to back to the build so that they are available in the report:
| |
Note: the testRunTitle attribute allows the tests to be grouped by the different agents. If this is omitted, all the tests for each agent get bundled together which makes it nearly impossible to tell which agent the tests failed on.
_ _Finally, for the Build_PSCore_MacOS1013 job, I needed to perform similar tasks as the Windows one, but I also needed to add an additional task:
- Install PowerShell Core:
| |
- Run the PowerShell script ps1 in the repository (with -Verbose output enabled). The build.ps1 just runs the tests (using Pester), build the PowerShell help (using Platyps) and prepares the module for publishing. It does this by using PSake to run tasks defined in the psakefile.ps1:
| |
Note: This is slightly different to the Windows task as I can’t use the PowerShell task type, I instead use the script task type, executing pwsh (PowerShell Core) and passing in the name of the script to run.
Publish the result of the Pester tests to back to the build so that they are available in the report:
| |
Note: the testRunTitle attribute allows the tests to be grouped by the different agents. If this is omitted, all the tests for each agent get bundled together which makes it nearly impossible to tell which agent the tests failed on.
As you can see, there is not too much functionality in the YAML file itself. The real work is done by the build.ps1 and the psakefile.ps1. Both of these scripts work the same way no matter whether I’m using AppVeyor, Travis CI or Azure DevOps Pipelines, and I use pretty much the same code in all of them.
Pipeline Variables and Secrets
The final thing I needed to do to complete my Azure DevOps Pipeline, was to add environment variables containing the Azure service principal details allowing my Pester tests to connect to my Azure account to create a real Cosmos DB to test against. These environment variables are sensitive (they grant access to my Azure account) and so must be treated with care and never committed into a source code repository.
The normal way of sharing sensitive information with the agent is to define pipeline variables:
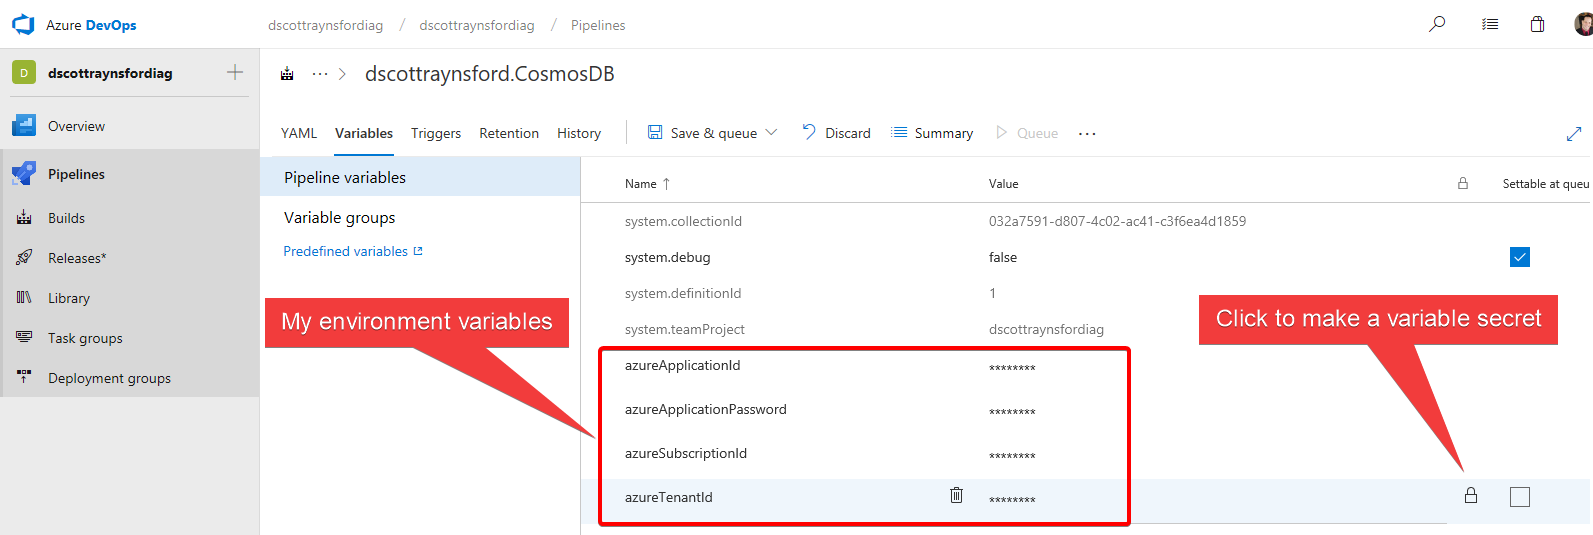
Any variable that is not a secret variable will be available to the agent as an environment variable. However, pipeline variables that are defined as secret will not be available as an environment variable. They are exposed in other ways, see this page for more details.
Note: This is different behaviour than in AppVeyor or Travis CI which expose both secret and non-secret variables as environment variables. In my case I will need to adjust my build.ps1 script to take account of this.
Some other important notes about pipeline variables:
- Usually only the owner of the build definition can edit or see these build variables. Other public users can not view or edit the build definition, so they cannot see the pipeline variables
- Pipeline variables are not made available to builds triggered by a pull request because this would make them accessible to anyone who submitted the pull request to your repository. This behaviour can be changed, but it would compromise any variables declared in the build definition.
- Pipeline variables can be defined within the azure-pipelines.yml file as well, however, this would result in the values being committed into your source code repository which would compromise the values.
Next Steps
There are still several tasks I have yet to complete before I’m completely satisfied that my Azure DevOps Pipelines CI (and continuous delivery) process is 100% finished:
- Change the integration test process to be able to access the pipeline variables that are declared as secret. This will enable the integration tests in my Cosmos DB module to use my personal Azure account to create a Cosmos DB account and run tests against it.
- Output my module and related files (documentation etc.) as a build artefact. This makes them part of the build output and available for download if the build still exists. My AppVeyor CI Process currently does this, and I just need to add the additional tasks to the azure-pipelines.yml
- Move the process of publishing the module to the PowerShell Gallery from my AppVeyor CI process into Azure DevOps Pipelines as a Release Pipeline. The Release Pipeline will be triggered from a Build Pipeline producing an artefact from the master
Note: Release Pipelines are often linked to a Continuous Delivery process. If there is interest, I will share a guide on how I set this up. However, at the time of writing this article, Release Pipelines in Azure DevOps cannot be controlled from a YAML file, so the more traditional visual designer method of defining a Release Pipeline is required.
Summary
I found the experience of enabling Azure DevOps Pipelines seamless and well thought-out. It provides several great features that aren’t as full featured in other free CI tools, such as:
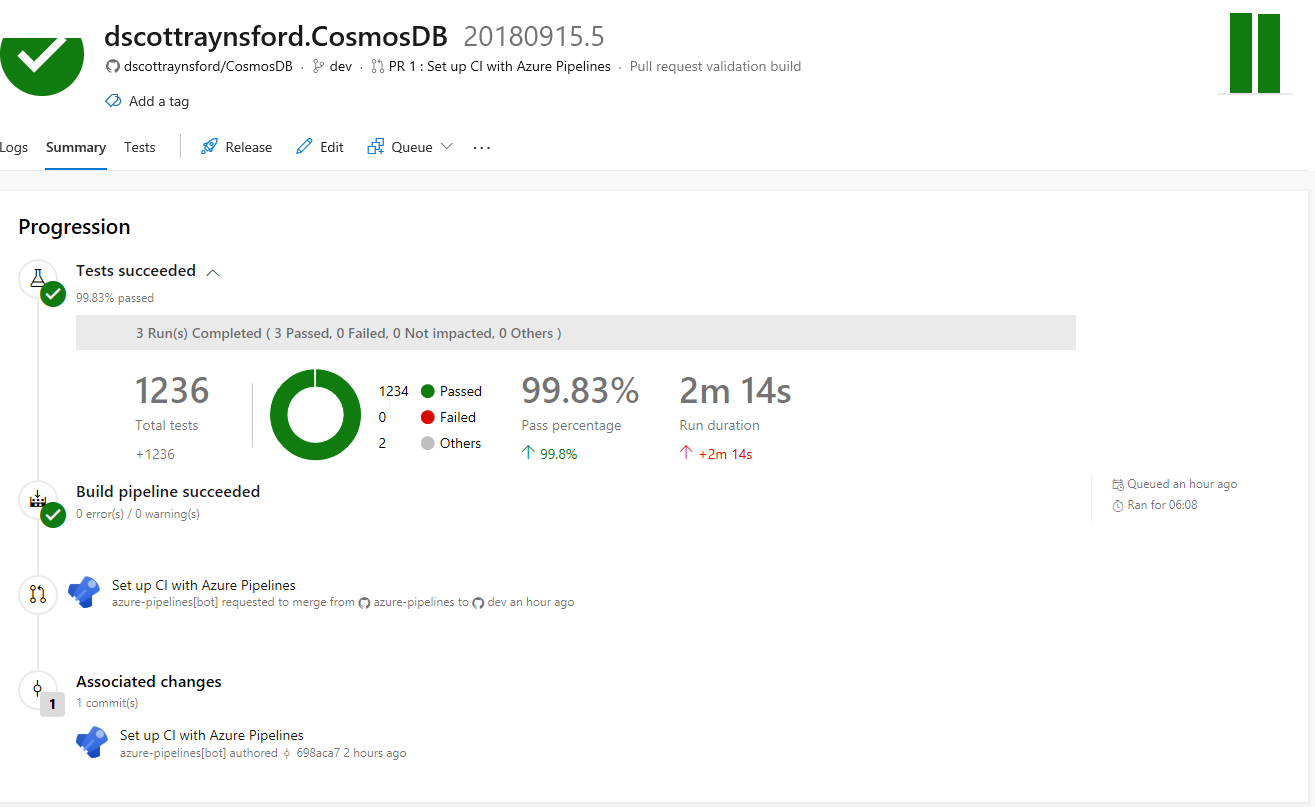
- The Test Summary and test filters are also very useful when tracking down a failed test:

If you’re looking into implementing a CI process for an open source project, then Azure DevOps Pipelines worth a look. Or if you’re just wanting to add another layer of validation to a project with an existing CI process then this should be a fun an easy implementation.
Share on: